Ever since its creation, Google Ads has been one of the most effective paid advertising platforms.

According to a 2020 report by WebFX, more than 80% of global businesses trust Google Ads for their PPC campaigns.
PPC campaigns on Google Ads can be highly effective in increasing brand awareness, generating leads, and driving sales.
However, running a successful Google Ads campaign is not as easy as it sounds.
There are a lot of factors that need to be taken into consideration, such as keyword research, ad copywriting, bidding strategies, and more.
Not sure where to begin? No worries. As a leading pay-per-click agency, we have compiled these tips to ensure your success.
In this article, we’ll give you a Google Ads optimization checklist in order to get the most out of your Google Ads campaigns so you’ll reap the benefits in no time.
Without further ado, let’s get started!
What is Google Ads Optimization?

Google Ads optimization is the process of making changes to your Google Ads campaigns in order to improve their performance.
This can include anything from changing your ad copy to tweaking your PPC strategy.
The goal of Google Ads optimization is to help you get more clicks, conversions, and sales at a lower cost-per-click (CPC).
Why is Google Ads Optimization Important?

Google Ads optimization is important because it can help you save money on your PPC campaigns while also increasing your click-through rate (CTR) and conversion rate.
A higher CTR and conversion rate will not only result in more sales and leads but will also lower your CPC because you’re paying less for each click.
What’s more, optimizing your Google Ads campaigns can help you improve your quality score, which is a factor that determines how much you pay per click.
A higher quality score means you’ll pay less per click and have a better chance of having your ads displayed in a prime location on the search engine results page (SERP).
5 Reasons Why Your PPC Ads Aren’t Working (and How to Fix Them)

Launching your PPC campaign and expecting it to work miracles is like planting a seed and expecting it to grow into a tree overnight.
You need to be patient and give your campaign time to grow and mature. However, there are certain things you can do to speed up the process and ensure that your PPC ads are working effectively.
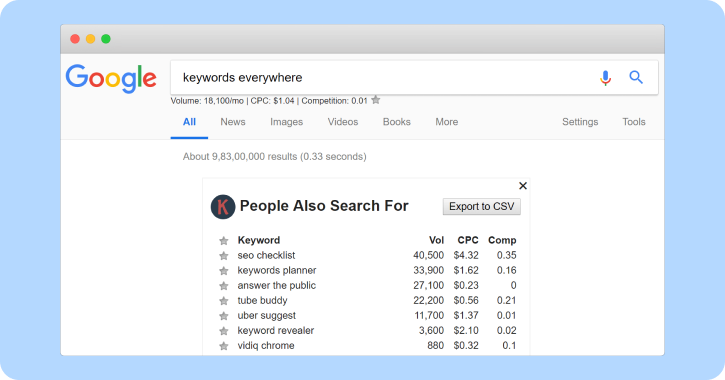
1. You’re Not Targeting the Right Keywords
One of the most common reasons why PPC ads fail is that businesses are not targeting the right keywords.
They either target too many broad keywords that get little to no traffic or they target too many specific keywords that are too niche and don’t get enough searches.
The solution is to find a happy medium by grouping your keywords into ad groups. This will help you stay organized and ensure that your ads are being shown to the people who are most likely to convert.
Keyword Types You Need to Know
Let’s say your target keyword is “user acquisition”
Broad match – Your ad will be shown when someone searches for a keyword that includes your target keyword, as well as related keywords.
Example: Broad match keywords – acquisition
Related keywords – user acquisition, customer acquisition, mobile user acquisition
Phrase match – Your ad will be shown when someone searches for a phrase that includes your target keyword.
Example: Phrase match keyword – “startup user acquisition,” “user acquisition strategies”
Exact match – Your ad will only be shown when someone searches for your exact target keyword.
Example: Exact match keyword – [“user acquisition”]
Important tip: Group your keywords in an ad group that targets a single theme or topic. An exact keyword will help your ads stay relevant to the searcher’s intent and increase your click-through rate.
To create an ad group, go to the “Ad Groups” tab in your Google Ads account and click on the “+ New ad group” button.
Then, enter a name for your ad group and select the type of keywords you want to target.
2. Your Google Ads Are Not Relevant to Your Landing Page
Another common reason for PPC ads not working is that they are not relevant to the landing page they are sending traffic.

This is a big no-no in the world of Google Ads. Your ad copy, keywords, and landing page must all be closely related or you will be penalized with a low-quality score.
The solution is to make sure that your ad copy is relevant to the keywords you’re targeting and that your landing page is relevant to both your ad copy and keywords.
For instance, if you’re targeting the keyword “running shoes” then your ad copy should mention running shoes and your landing page should be about running shoes.
Don’t stray too far from your initial keyword or you will lose relevance and your quality score will suffer.
3. You’re Not Using Negative Keywords
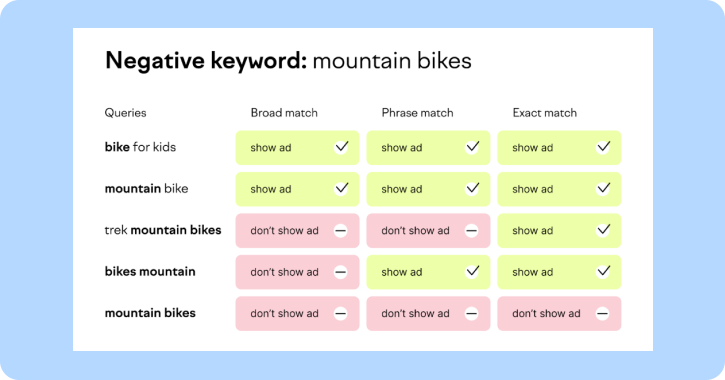
If you’re not using negative keywords, then you’re probably wasting a lot of money on irrelevant clicks.
Negative keywords allow you to exclude certain words or phrases from your campaigns so that your ads are only shown to people who are actually interested in what you’re selling.
For example, let’s say you run a SaaS (Software as a Service) platform for email marketing but you don’t want your ad to show up when someone searches for “social media marketing platform.”
In this case, you would add “social media” as a negative keyword to your campaign. This way, your ad will only be shown to people who are actually interested in an email marketing platform.
To add negative keywords to your campaign, go to the “Keywords” tab and click on the “+ Keywords” button.
Then, enter your negative keywords into the “Negative keywords” field. You can add multiple keywords by separating them with commas.
Learn more about Negative Keywords And How To Improve Your Broad Match Performance and Increase ROAS.
4. Your Ad Copy Is Not Compelling
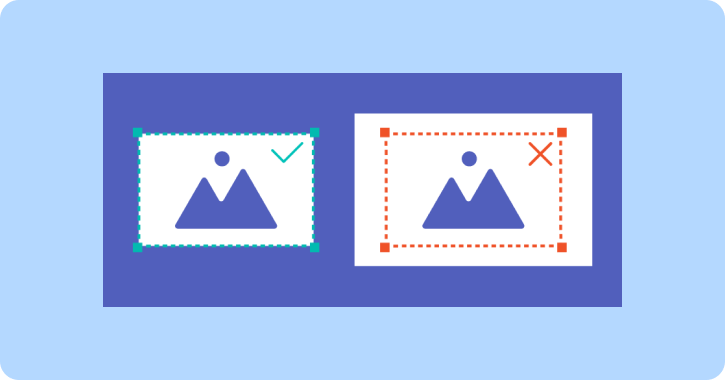
If your ad copy is not compelling, then people will simply scroll right past it.
Your ad needs to stand out from the rest and give people a reason to click on it. The best way to do this is to focus on your unique selling proposition (USP).
What makes your product or service better than the competition? This is what you need to highlight in your ad copy.
Your USP could be anything from a money-back guarantee to free shipping or a lower price. Whatever it is, make sure it’s prominent in your ad copy.
5. You’re Not Testing & Optimizing Regularly
The final reason your Google Ads might not be working is that you’re not testing and optimizing regularly.
Just because your ad is live doesn’t mean it’s going to perform well. You need to constantly test different elements of your ad such as the headline, description, image, etc., and see what works best.
You also need to keep an eye on your metrics and adjust your campaign accordingly. If you’re not getting the results you want, then don’t be afraid to make changes.
The only way to know what works is to test and optimize regularly. There’s no magic formula for success, so you’ll need to experiment until you find what works best for your business.
Your Google Ads Checklist for Ultimate Optimization
Doing things on a whim won’t get you very far with Google Ads. If you want your campaigns to be successful, then you need to have a plan.
Here’s a quick checklist of the things you need to do to optimize your Google Ads:
1. Organize Your Google ads account
The first step is to organize your Google Ads account. This means creating separate campaigns for each of your products or services.
If you have a lot of products, then you might need to create multiple ad groups within each campaign.
The key is to keep things organized so that you can easily track and manage your campaigns.
Here is how you can start organizing in a few simple steps:

Creating a Campaign
Log in to your Google Ads account and click on the “Campaigns” tab.
Click on the “+” button to create a new campaign.
Give your campaign a name, select a campaign type, and set your budget.
Click on the “Settings” tab and enter your target location, language, and other relevant settings.
Click on the “Ad groups” tab and create a new ad group.
Give your ad group a name and select a keyword match type. You can also add negative keywords at this stage.
Add Your Target Keywords
The next step is to add your target keywords. These are the keywords that you want your ads to show up for when people search on Google.
To add keywords to your campaign, go to the “Keywords” tab and click on the “+ Keywords” button.
Enter your keywords into the “Keyword text” field and select a match type. You can also add negative keywords at this stage.
If you’re not sure which keywords to target, then you can use Google’s Keyword Planner tool to find relevant keywords for your business.
Create Your Ads
Now it’s time to create your ads. To do this, go to the “Ads” tab and click on the “+ Ads” button.
Enter your ad headline, description, display URL, and destination URL. You can also add images, videos, or call-to-action buttons to your ads.
Make sure to preview your ad before you save it. Once you’re happy with your ad, click on the “Save” button.
Monitor Your Campaign Performance
The final step is to monitor your campaign performance. To do this, go to the “Campaigns” tab and click on the “All campaigns” drop-down menu.
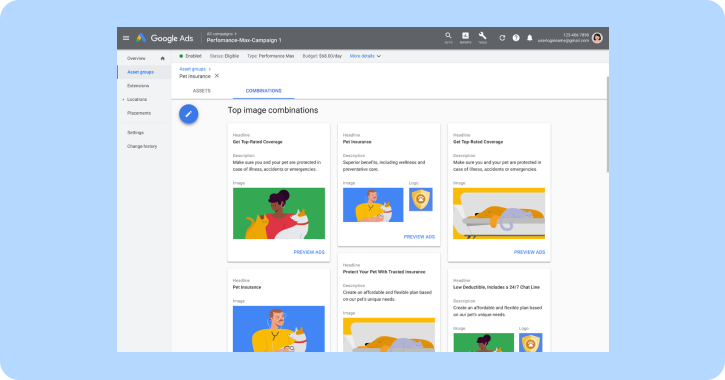
Select “Performance view” from the menu.
This will show you a list of all your campaigns and their performance metrics.
You can use these metrics to track your progress and make changes to your campaigns as needed.
2. Set Up Conversion Tracking
If you want to track your Google Ads campaigns effectively, then you need to set up conversion tracking.
Conversion tracking allows you to see how many sales or leads you’ve generated from your Google Ads campaigns.
Without conversion tracking, you’ll only be able to see how many clicks your ads have received.
This doesn’t give you the full picture and makes it difficult to gauge your campaign’s success.
With conversion tracking, you can see which keywords, ads, and ad groups are performing well and which ones need improvement.
To set up conversion tracking, log in to your Google Ads account and click on the “Tools” tab.
Click on the “Conversions” link and then click on the “+ Conversion” button.
Enter a name for your conversion, select a category, and set your conversion value.
You can also choose how you want to track your conversions. The most common option is to use a tracking pixel.
A tracking pixel is a small piece of code that you add to your website. When someone clicks on your ad and completes the desired action (such as buying a product or signing up for a newsletter), the tracking pixel will fire and send data back to Google Ads.
Before you start bidding on keywords, it’s important to do your research.
You need to find out which keywords are most relevant to your business and which ones are most likely to convert into sales or leads.
3. Research Your Keywords
To do this, you can use Google’s Keyword Planner tool.
Log in to your Google Ads account and click on the “Tools” tab.
Click on the “Keyword Planner” link and then click on the “Search for new keywords using a phrase, website, or category” link.
Enter a seed keyword into the “Your product or service” field and click on the “Get Ideas” button.
This will generate a list of related keywords.
You can then filter the results by keyword match type, average monthly searches, competition, and more.
Once you’ve found a list of relevant keywords, you can add them to your Google Ads campaign.
4. Set Your Campaign Budget
One of the most important aspects of running a successful Google Ads campaign is setting an appropriate budget.
Your budget will determine how often your ads are shown and how much you’re willing to spend on each click.
It’s important to set a realistic budget that you can stick to. If you set your budget too low, then your ads may not be shown as often as you’d like.
On the other hand, if you set your budget too high, then you could end up wasting money on clicks that don’t convert into sales or leads.
To set your campaign budget, log in to your Google Ads account and click on the “Campaigns” tab.
Click on the “Budget” link and then enter your desired monthly budget.
You can also choose to set a daily budget or a schedule for your campaign.
5. Maximize Your Google Ads Copy’s Potential
Your ad copy is one of the most important elements of your Google Ads campaigns.
The copy is what will persuade people to click on your ad, so it’s important to make it as effective as possible.
Here are a few tips for writing effective ad copy:
- Use keywords in your headline: Your headline should be attention-grabbing and relevant to the keyword you’re bidding on.
- Write a compelling description: Your description should explain what your product or service is and why it’s better than the competition.
- Use call-to-action phrases: Call-to-action phrases such as “buy now” or “sign up today” can help encourage people to click on your ad.
- Include a relevant offer: Offers such as free shipping or a discount can help persuade people to click on your ad.
Once you’ve written your ad copy, you can test it out by running a split test.
A split test (also known as an A/B test) is when you create two versions of your ad and then see which one performs better.
Running a Split Test
To run a split test, log in to your Google Ads account and click on the “Campaigns” tab.
Click on the “Ads” link and then click on the “+ Ad” button.
Enter the necessary information for your ad and then click on the “Save & Continue” button.
On the next page, you’ll be able to create a second version of your ad. Make sure to make changes to both the headline and the description.
Once you’ve created both versions of your ad, click on the “Save” button. Your split test will then run and Google will determine which version of your ad performs better.
6. Understand Your Audience and Target Them Through Using RLSAs
If you want to be successful with your Google Ads campaigns, then you need to understand your audience.
Who are they? What do they want? What are their pain points?
Answering these questions will help you create ads that resonate with your target audience.
One way to target your audience is by using remarketing lists for search ads (RLSA).
RLSA allows you to show your ads to people who have visited your website in the past.
To set up an RLSA campaign, log in to your Google Ads account and click on the “Campaigns” tab.
Click on the “Shared library” link and then click on the “Audiences” link.
On the next page, click on the “+ Remarketing list” button.
Enter the necessary information for your remarketing list and then click on the “Save & Continue” button.
Once you’ve created your remarketing list, you can add it to an existing campaign or create a new RLSA campaign.
To do this, log in to your Google Ads account and click on the “Campaigns” tab.
- Click on the “+ Campaign” button and then select “Search Network with Display Select.” Enter the necessary information for your campaign and then scroll down to the “Audiences” section.
- Click on the “Add remarketing list” button and select the remarketing list you created earlier.
- Click on the “Save & Continue” button and your RLSA campaign will be created.
7. Optimize Your Landing Page
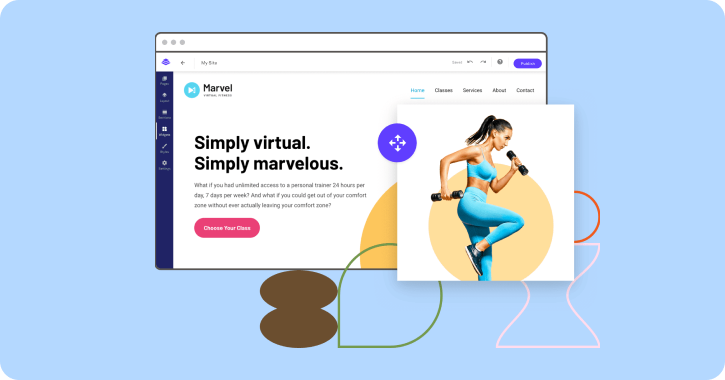
Your landing page is the page on your website that people will land on after they click on your ad.
And if you want to convert those clicks into customers, then you need to optimize your landing page for conversions.
Here are a few tips for optimizing your landing page:
- Include a strong headline: Your headline should be relevant to your ad and it should grab people’s attention.
- Use persuasive copy: Your copy should explain what your product or service is and why people need it.
- Include a call-to-action: Your call-to-action should be clear and it should tell people what you want them to do.
- Use images: Images can help break up your text and they can also help illustrate your point.
- Keep it short and sweet: Don’t include too much information on your landing page. Just include the essentials.
Once you’ve optimized your landing page, you can start running your Google Ads campaigns.
8. Regularly Test and Monitor Your Campaigns
To be successful with Google Ads, you need to regularly test and monitor your campaigns.
You should test things like ad copy, keywords, and landing pages.
And you should also monitor your campaign’s performance to see what’s working and what’s not.
If you’re not sure how to do this, then you can use Google Analytics.
Using Google Analytics
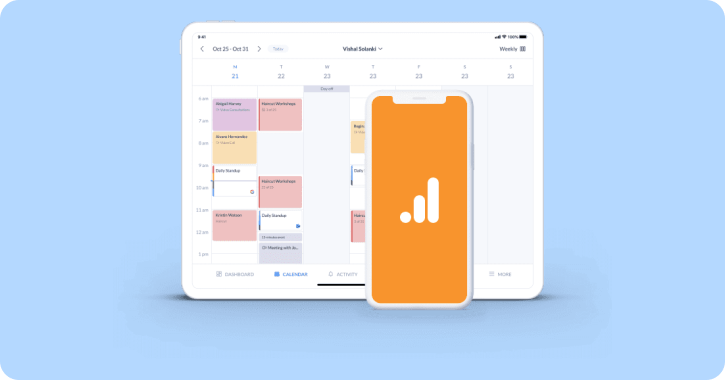
Google Analytics is a free tool that allows you to track your website’s traffic.
To set it up, log in to your Google Ads account and click on the “Tools” tab.
Click on the “Analytics” link and then click on the “+ Add new property” button.
On the next page, enter the necessary information for your website and then click on the “Get Tracking ID” button.
Once you have your tracking ID, you need to add it to your website.
If you’re not sure how to do this, then you can contact your web developer or use a plugin like Google Analytics for WordPress.
Once you’ve added your tracking ID to your website, you can start monitoring your campaign’s performance.
Monitoring Your Campaign’s Performance
To do this, log in to your Google Ads account and click on the “Reporting” tab.
Click on the “Campaigns” link and then select the campaign you want to track.
On the next page, you’ll see a variety of statistics that you can use to track your campaign’s performance.
Pay attention to things like your click-through rate, conversion rate, and cost per conversion.
These statistics will help you determine whether or not your campaign is successful.
If you’re not happy with your campaign’s performance, then you can make changes to improve it.
9. Optimize Your Bids
Your bids are the amount of money you’re willing to pay for each click on your ad.
And if you want to be successful with Google Ads, then you need to optimize your bids.
There are a few different ways to do this:
- Target search terms that are less competitive: If you’re targeting search terms that are highly competitive, then you’ll need to pay more for each click.
- Target long-tail keywords: Long-tail keywords are less competitive than short-tail keywords.
- Use negative keywords: Negative keywords allow you to exclude certain words from your campaigns.
- Use keyword match types: There are four different keyword match types: broad match, phrase match, exact match, and broad match modifier.
- Set your bid amount: You can set your bid manually, or you can let Google set it for you.
To set your bid amount, log in to your Google Ads account and click on the “Tools” tab.
Click on the “Keywords” link and then click on the “Edit” button next to the keyword you want to modify.
On the next page, enter your desired bid amount and then click on the “Save” button.
10. Categorize Primary, Secondary & Marginal Campaigns

There are three different types of campaigns: primary, secondary, and marginal.
Primary campaigns are the most important campaigns. They’re the campaigns that are most likely to generate sales and they’re the campaigns that you should focus most of your attention on.
Secondary campaigns are less important than primary campaigns, but they’re still important. They might not generate as many sales, but they can still be valuable.
And marginal campaigns are the least important type of campaign. They might not generate any sales, but they can still help you with branding or website traffic.
To categorize your campaigns, log in to your Google Ads account and click on the “Campaigns” tab.
Click on the “All Campaigns” link and then click on the “Edit” button next to the campaign you want to categorize.
On the next page, scroll down to the “Campaign Type” section and select either “Primary,” “Secondary,” or “Marginal.”
11. Gain More Control Over Your Ads by Using SKAGs
If you want to have more control over your ads, then you should consider using SKAGs.
SKAGs stand for single keyword ad groups. And they’re a way to group your keywords together so that you can create more targeted ads.
Creating a SKAG
To create a SKAG, log in to your Google Ads account and click on the “Campaigns” tab.
Click on the “All Campaigns” link and then click on the “+ New campaign” button.
On the next page, select the “Search Network Only” option and then click on the “Continue” button.
On the next page, enter your campaign information and then scroll down to the “Ad Group” section.
In the “Ad Group” section, enter a single keyword into the “Keywords” field and then click on the “+” button.
Repeat this process for each keyword you want to add to your SKAG.
Once you’ve added all of your keywords, click on the “Continue” button.
On the next page, you’ll be able to create your ad.
12. Consider Using PPC Spy Tools
If you want to be successful with Google Ads, then you should consider using PPC spy tools.
PPC spy tools allow you to see what your competitors are doing with their campaigns. You can see what keywords they’re targeting, what ads they’re running, and how much they’re spending.
This information can be extremely valuable when you’re trying to optimize your own campaigns.
There are a few different PPC spy tools available, but some of the most popular options include SpyFu, iSpionage, and SEMrush.
13. Spend Money When People Are Converting Using Dayparting
Dayparting is a Google Ads feature that allows you to specify when your ads should run.
You can use dayparting to make sure that your ads are only shown when people are most likely to convert.
For example, if you’re running an ad for a product that people usually buy during the daytime, then you would want to set your dayparting so that your ad is only shown during the daytime.
To set up dayparting, log in to your Google Ads account and click on the “Campaigns” tab.
Click on the “All Campaigns” link and then click on the “Edit” button next to the campaign you want to edit.
On the next page, scroll down to the “Settings” section and click on the “Day Parting” option.
Then move on to the following page where you’ll be able to specify when you want your ads to run.
Extra Tip: Use Google Ads Editor to Make Bulk Changes
Google Ads Editor is a free tool that allows you to make bulk changes to your Google Ads account.
It’s a desktop application that you can download and install on your computer. Once you’ve installed it, you can connect it to your Google Ads account and make changes to your campaigns, ad groups, keywords, and ads.
To download Google Ads Editor, log in to your Google Ads account and click on the “Tools” tab.
Click on the “Google Ads Editor” link and then click on the “Download” button.
Once you’ve downloaded and installed the tool, you can use it to make changes to your account.
Optimize Your PPC Ads and Increase Your ROI
There are a number of different things you can do to optimize your ads, but some of the most effective strategies include using negative keywords, using SKAGs, and using dayparting.
By using these strategies, you can increase your click-through rate, lower your cost-per-click, and ultimately increase your ROI.
If you’re not sure how to start your ads, you can consider consulting a PPC agency. You will be able to create and manage your campaigns so that you can achieve your desired results!

